All The Fab Fun of the Fair!

Once in a blue moon I get an overwhelming  urge to take a stall at a craft market. So when my local Infant School appealed for stall holders for their Summer Fair I thought it would be the perfect opportunity. 

With my usual mix of enthusiasm and excitement, I set about planning goodies that would be suitable for a predominantly ‘pocket money’ driven economy; in other words, what small children would eagerly want in exchange for all those hot, sticky, shiny pennies that they have extracted from their parents!!


Unfortunately, despite having the ability to identify my target audience I shall never, ever make any money from a craft fair and the reason is very simple; I get so carried away that I always buy too many fancy materials! 


To me the most joyful thing about having a stall is the planning, the purchasing, the producing and, finally, the packaging. 

  
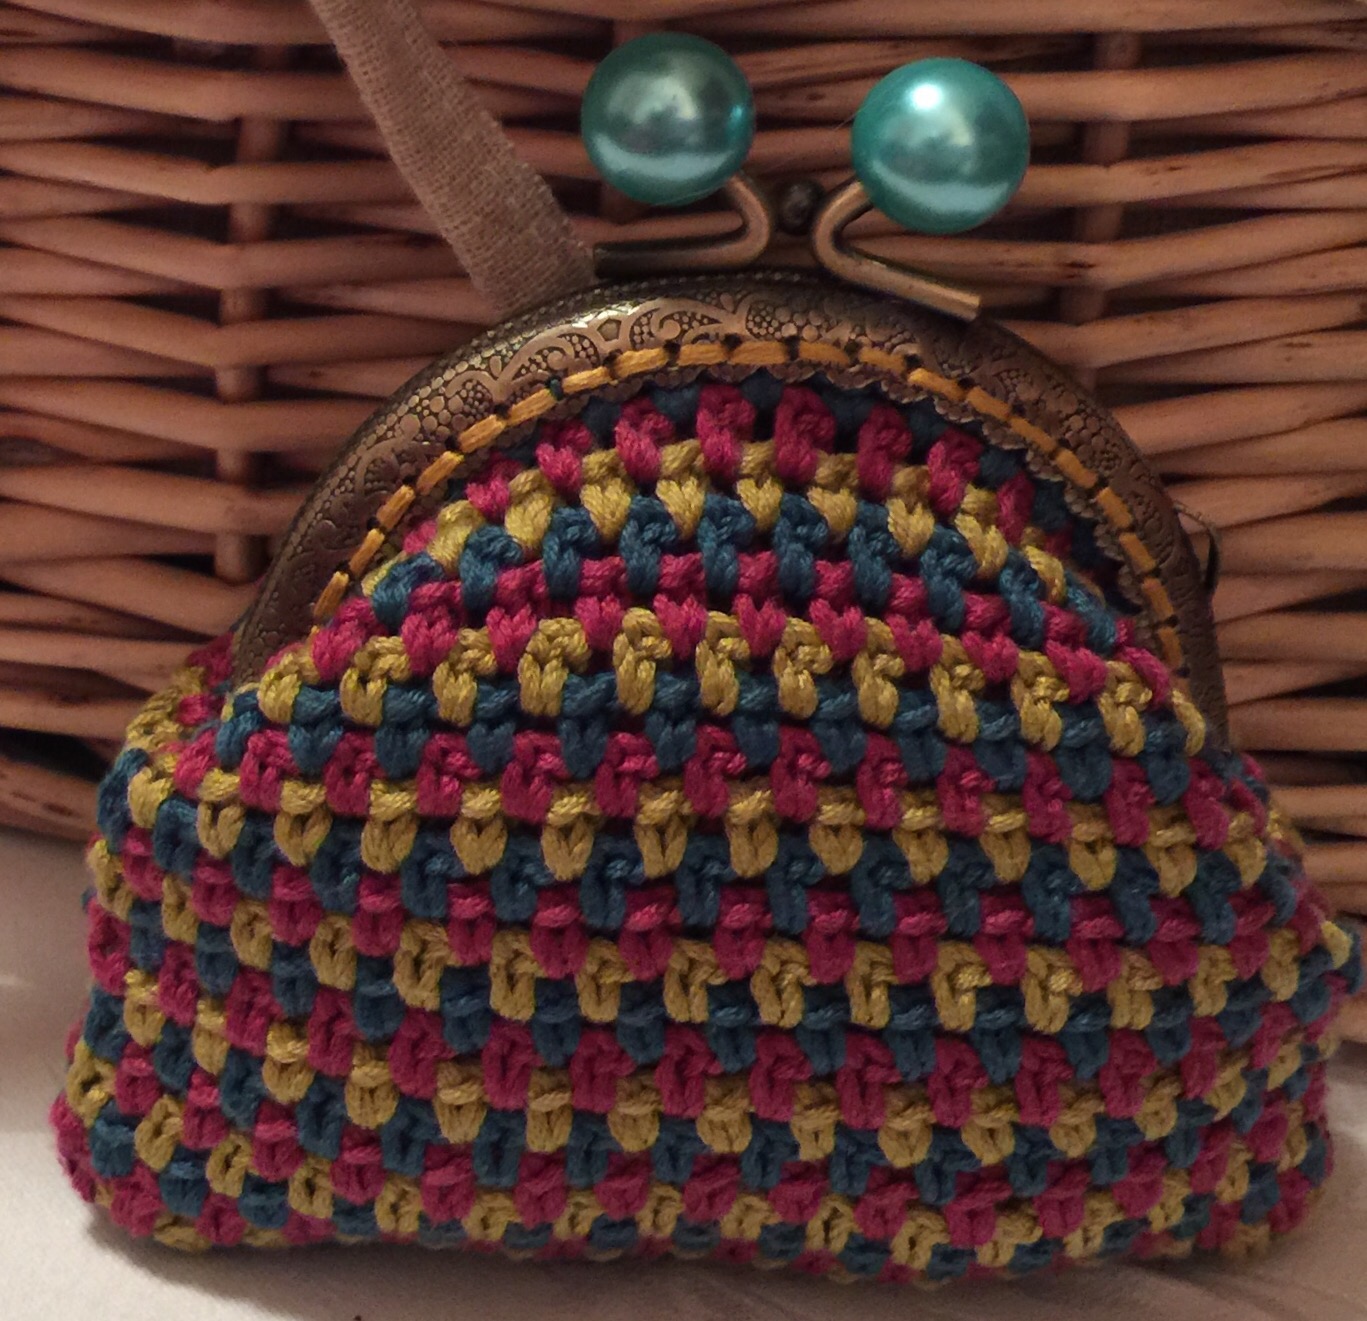
I decided to go for pretty cotton purses decorated with wonderful wooden butterfly buttons…


I adapted a pattern I had recently used  to make some really sweet pansy brooches, although I have to admit, I did keep a couple of these for myself!!


I also made some jolly hair slides again with some cute floral wooden buttons. 


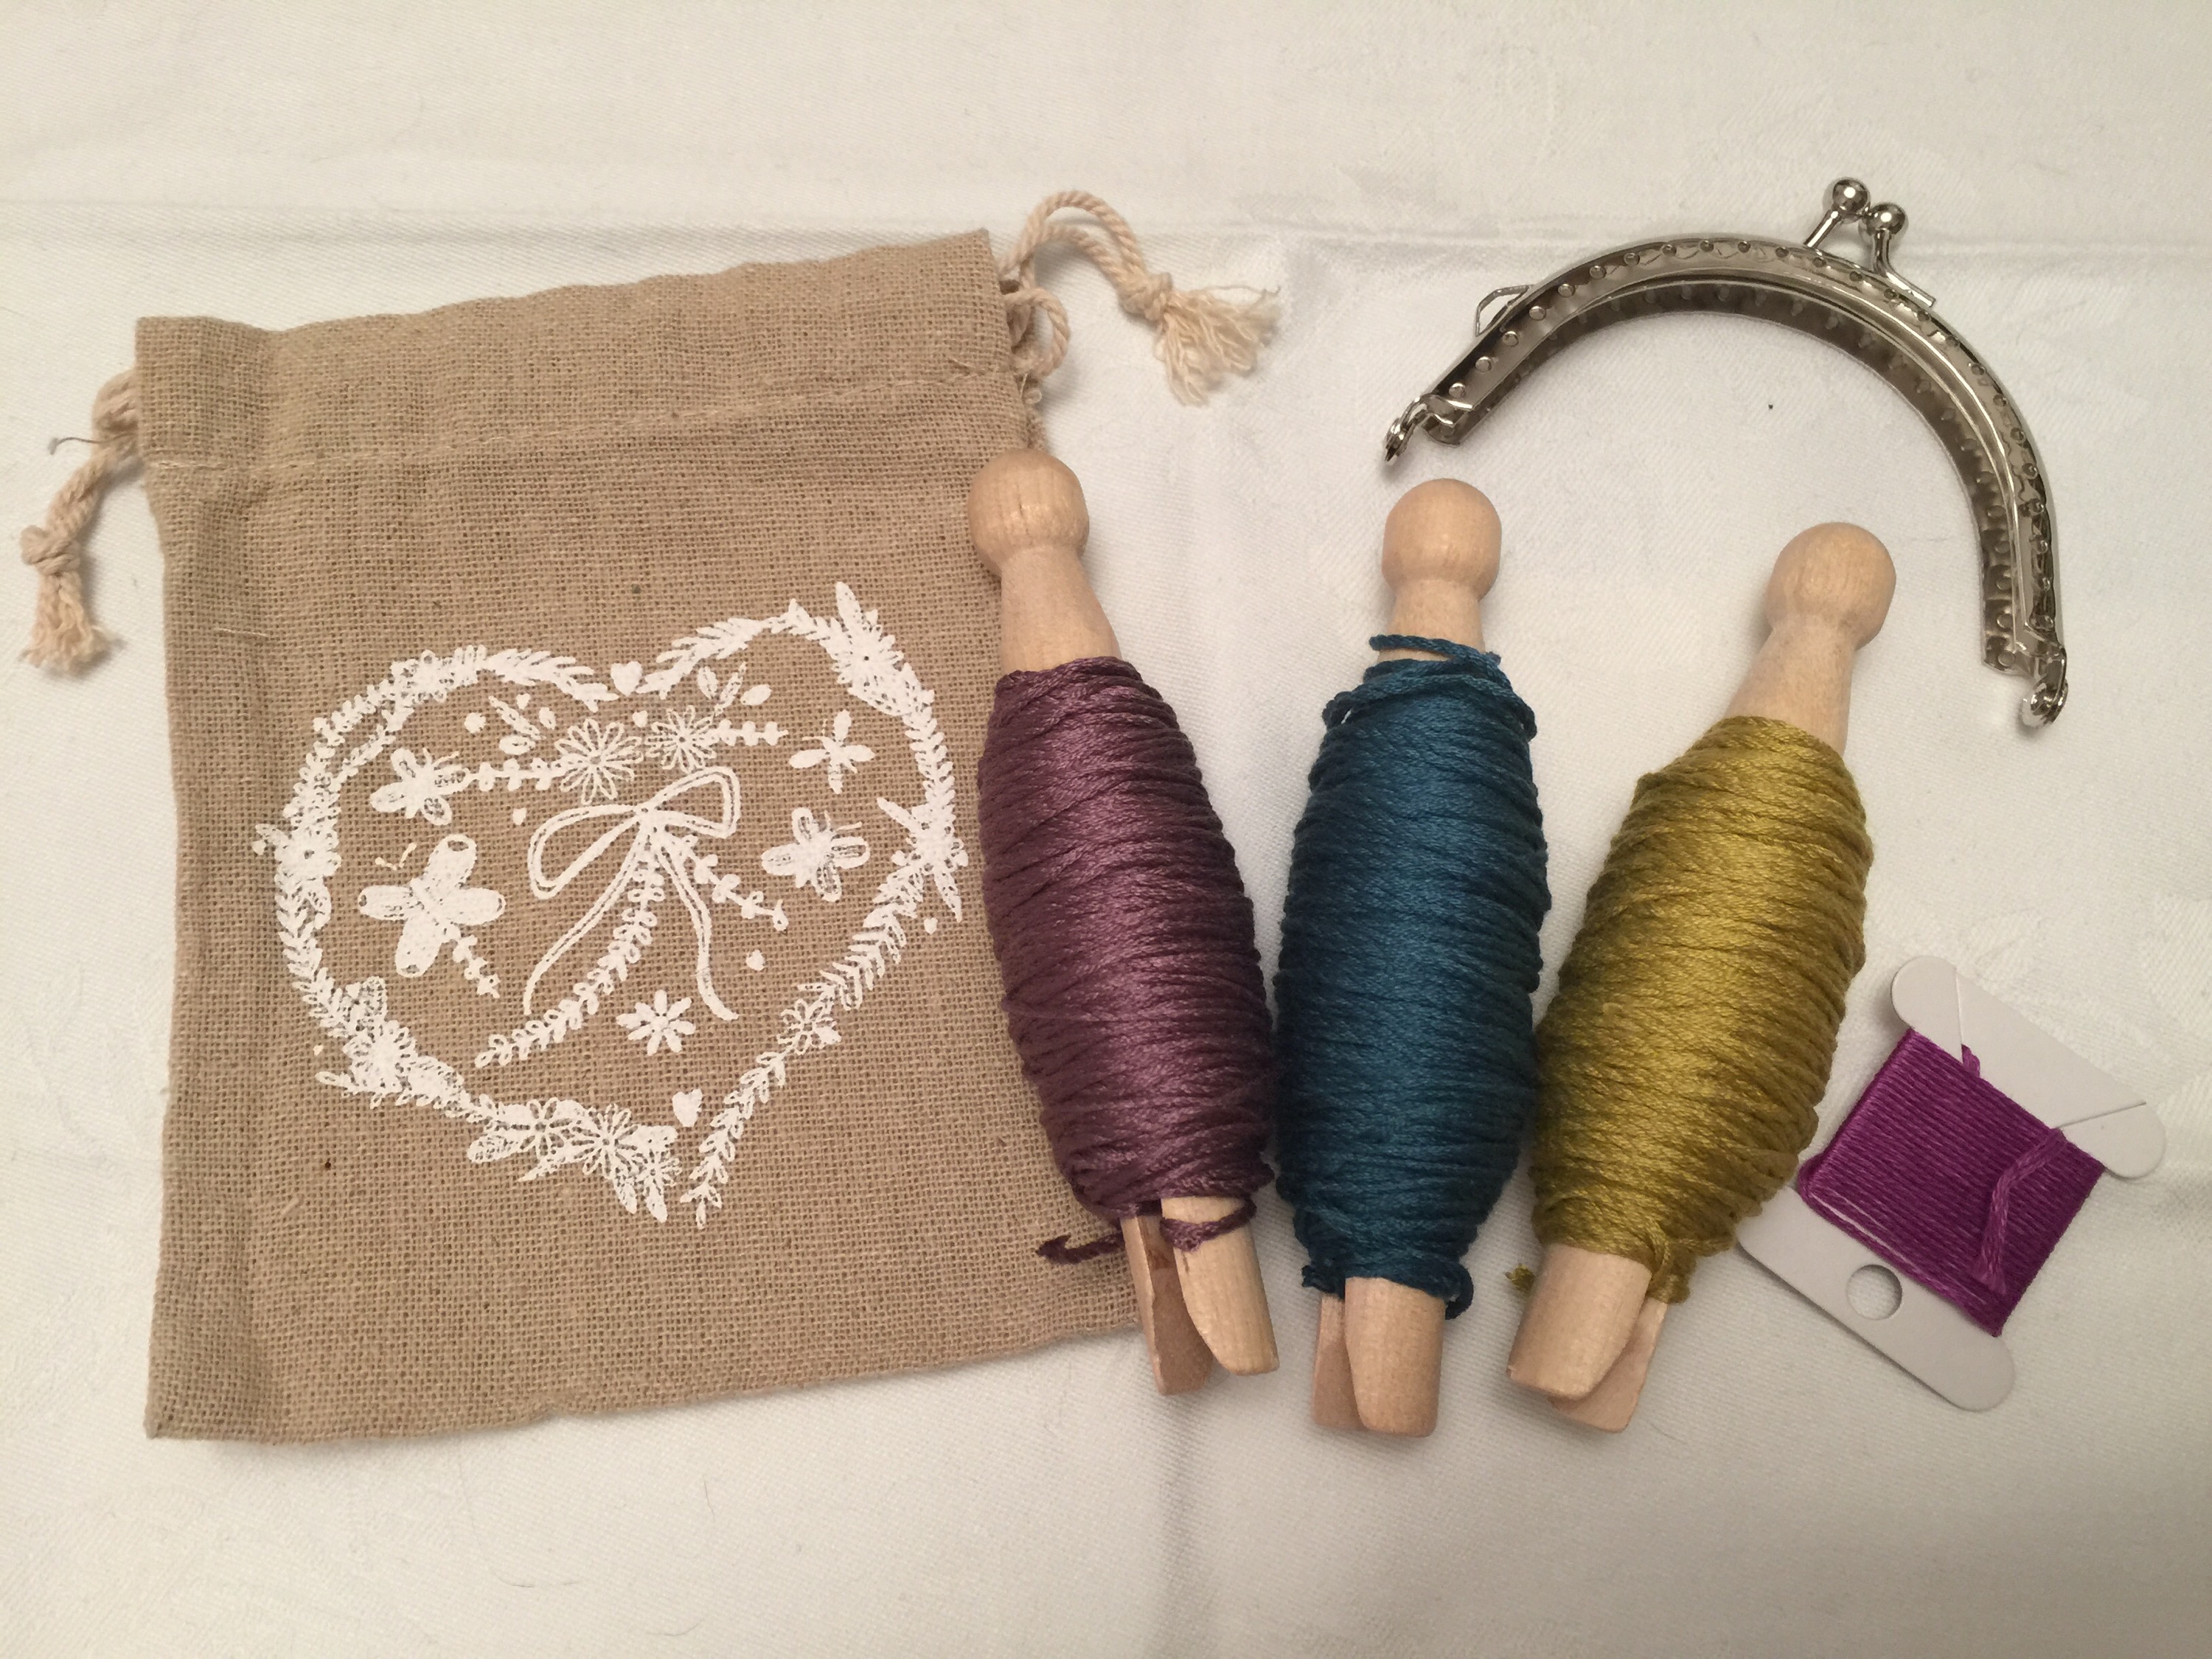
Then there were a few “Do It Yourself” knitting kits to encourage the children to produce their own hand made goodies. 


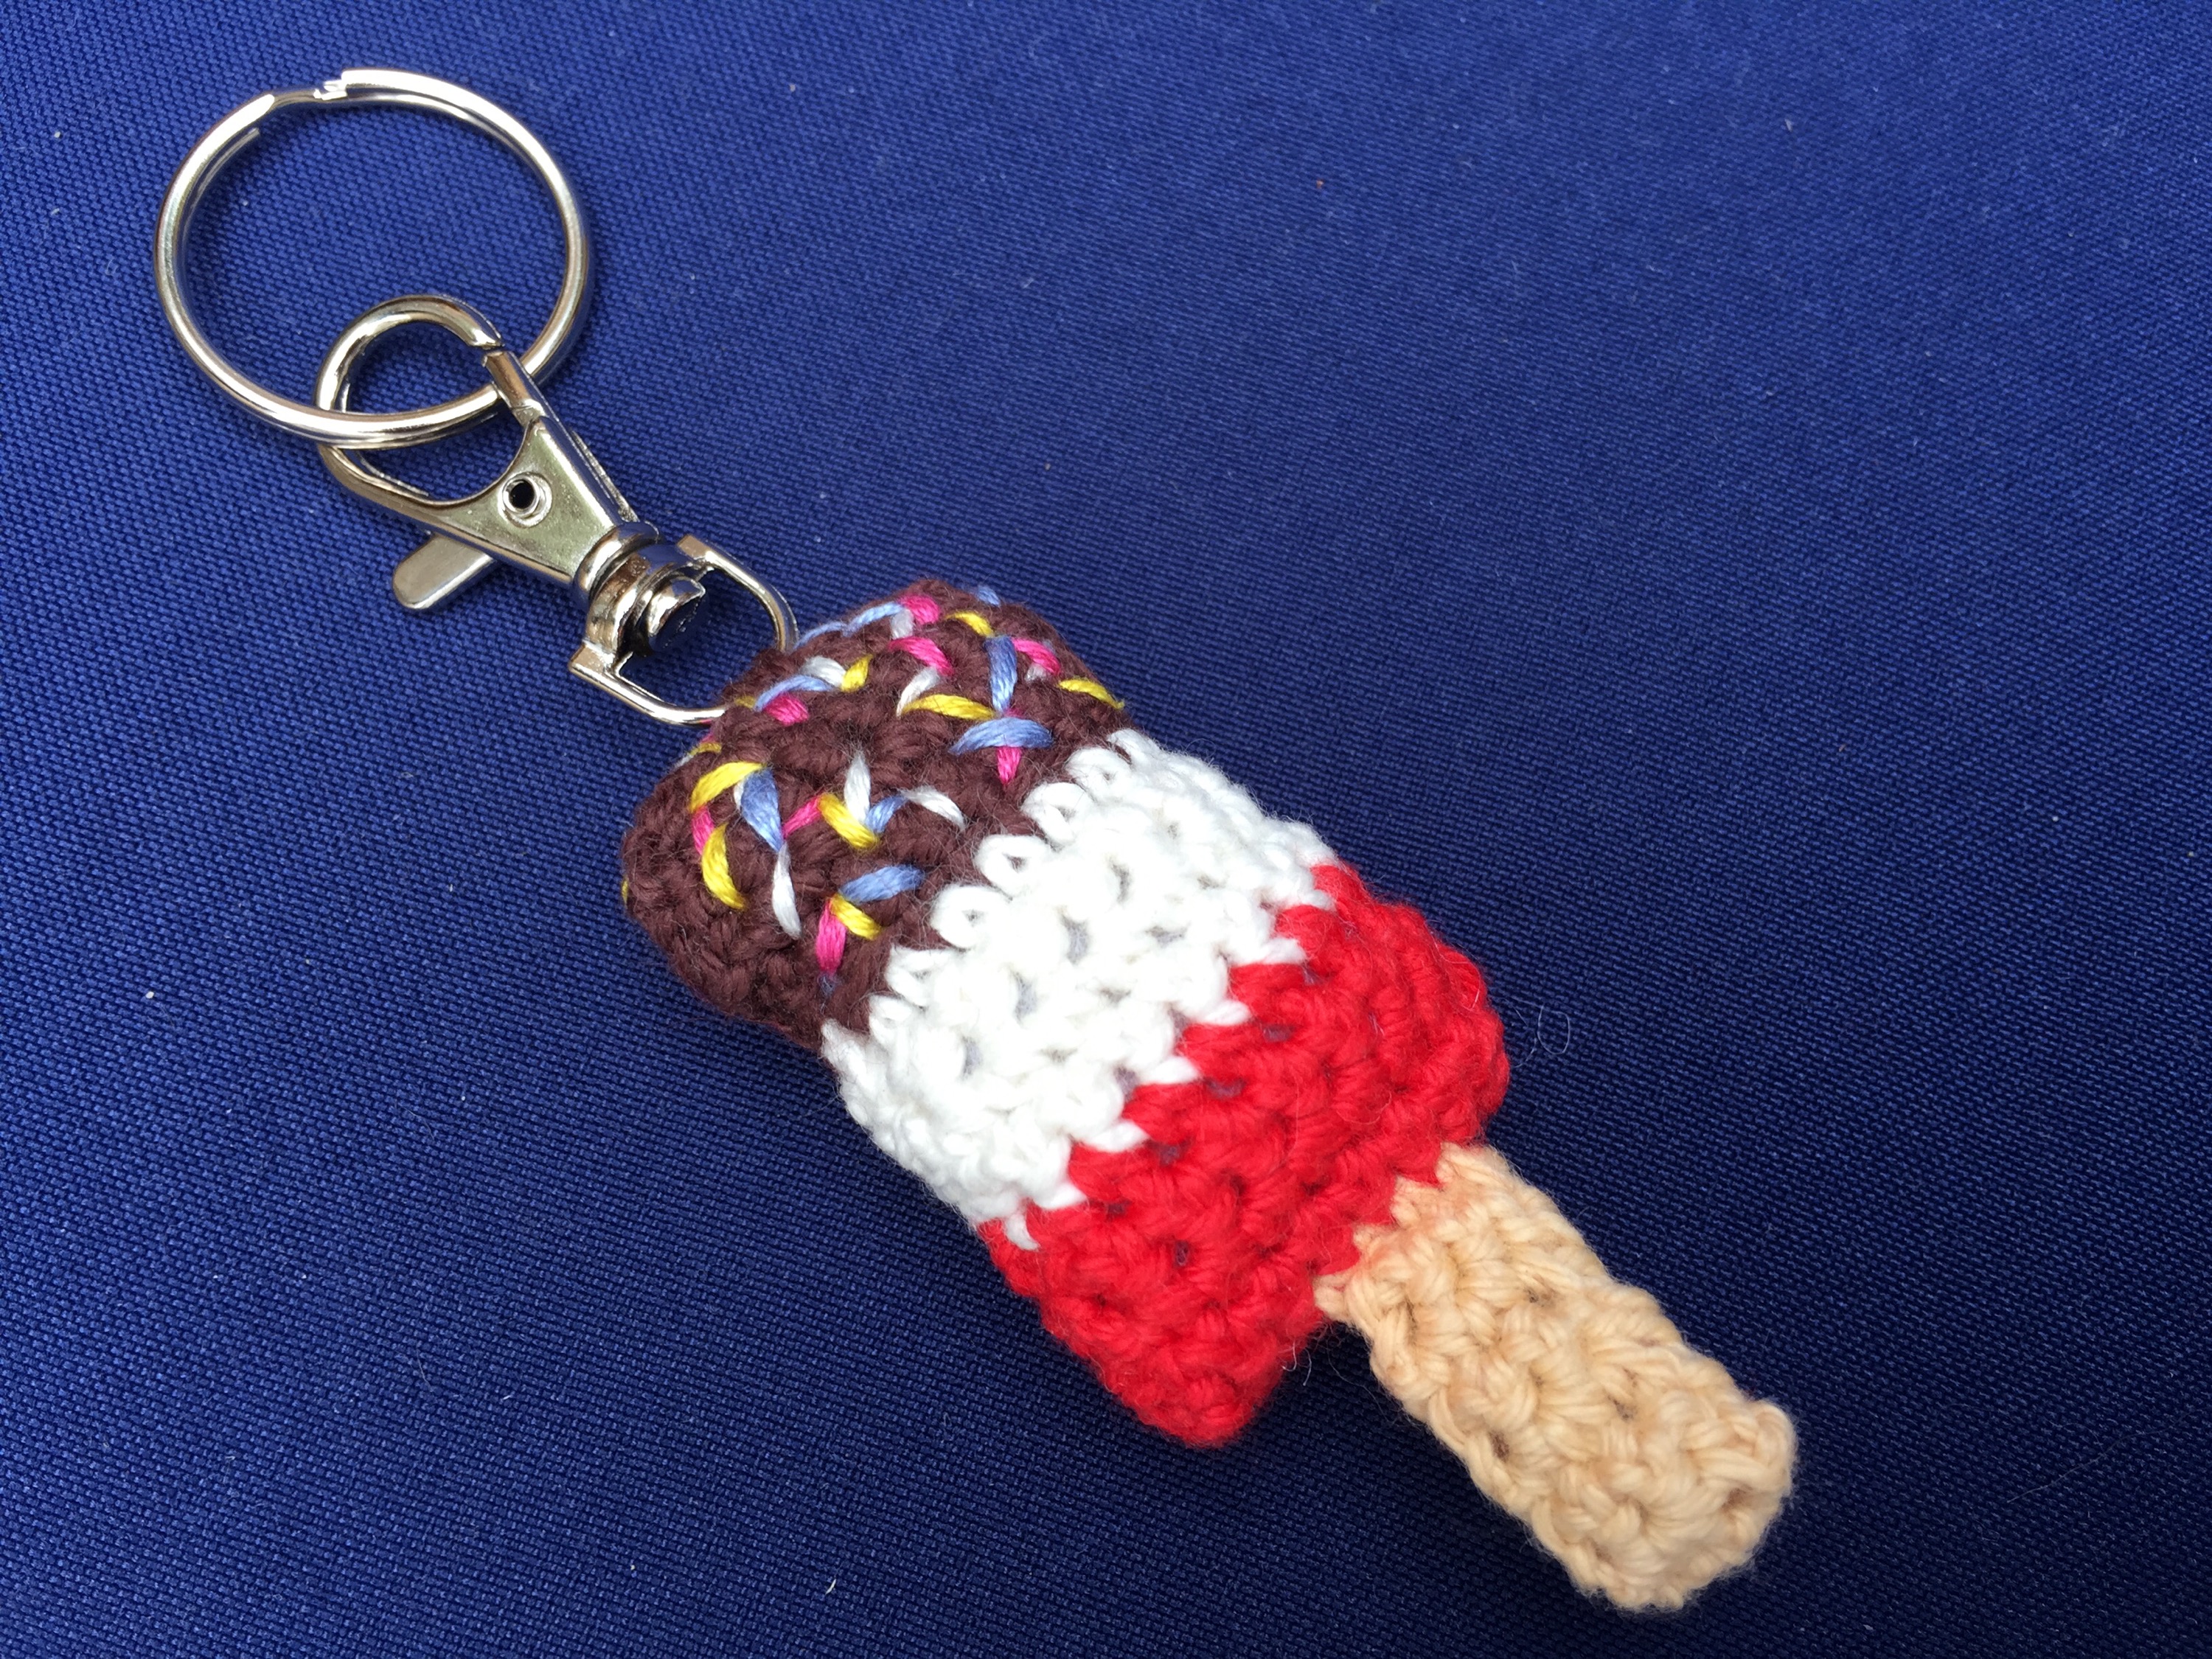
And then there were my absolute favourites; tiny crocheted key rings. These were just such fun to make and, judging by the their very quick disappearance, very popular with the children too!


The most popular key ring amongst the children and the adults were the “Fab” ice lollies!!

They were incredibly simple and quick to make so I thought I would share the pattern I devised should you feel the need to whip up a quick present or two!

Materials:

  • 4-ply Cotton in Red, Cream, Brown & Beige
  • 2.5 mm Crochet Hook
  • Toy Stuffing
  • Embroidery Thread in Pink, Cream, Yellow and Pale Blue
  • Key Ring or Lobster Claw
  • Sewing Needle


With the Red cotton make a chain of 9.

Foundation Row: Work a DC into the second chain from hook. Work a DC into the following 7 chains. 

Row: Turn, 1 DC, work 1DC into each of the 8 stitches. 

Work 3 more Rows in Red, 4 in Cream, 10 in Brown, 4 in Cream and 4 in Red. 

  
Using the embroidery threads, stitch scattered stitches “pell mell” to resemble the sprinkles. 

  
To make the “stick”, insert crochet hook into the 3rd stitch at the bottom of the piece and, using the beige cotton, DC into the next 3 stitches. 

  
Turn, work 1 DC and then work 1 DC into the 3 stitches. Repeat this 13 times. 

  
With the right side inside, fold the main piece in half so that the Red, Cream and Brown all match up. Sew up the sides. 

Turn the piece back so the right side is out and stuff with toy stuffing. 

Sew up the bottom of the main piece with the Red. 

Fold the “stick” in half and sew it up the side, along the top (where it meets the Red) and up the other side. 

Sew on the Lobster Claw or Key Ring and you are done!

  
How FAB is that??

Take Care,

Alitzah

Strawberry Teas forever…

I’ve always been a great believer in “Horses for Courses” and so, when I decided that I wanted to make some jolly tea cosies for a forthcoming event, I knew that using my finest Cashmere or Silk yarns would only result in tears before bedtime!

What was required was a yarn that was hard-wearing, very washable and with a good texture. It should have enough Wool to give it excellent definition and to keep any acrylic “shine” at bay. 

I went for the very sensible and robust Hayfield Bonus Aran; with 20% Wool and a choice of over 50 colours including Tweeds it gave me the range and colour palette to have some real fun!!

The yarn comes in 400g balls which makes it incredibly good value.

I simply wound off a few smaller balls to make things more easy to transport. After all this is an excellent portable project! 

 
I am also a great believer in “not trying to reinvent the wheel”! And with so many jolly, traditionally English Tea Cosies around, I decided to take my inspiration from original Vintage tea cosies of the 40s and 50s (No surprise there if you are a regular reader of my little blog!).

Until one starts to research Tea Cosies, one never really realises just how many types there are!! 

The two that stood out for me were the “Strawberry” and the “Basket of Flowers”.

  
For the “Basket of Flowers” style, I thought it might be nice to try a different flower from the usual rose and so when I came across the pattern for this pretty little pansy from Woman’s Weekly (Knitting and Crochet special, May 2014) I was inspired!

  
For the body of the tea cosy I wanted to create something rigid, that could stand up in its own right. After a fair bit of to-ing and fro-ing I have come up with what I think is the perfect pattern.  


The pattern I have devised can be utilised in a million different ways for one to create the Tea Cosy of one’s dreams! (Do you dream of Tea Cosies?? I think I might!!)

I knitted the first 3 stitches and last 3 stitches on every row up until Row 28 to give the sides some strength and a neater edge for the handle and spout openings. 

As you can use any stitch that can be multiplied to make 24, I have simply written “pattern”. I’ll give you the “pattern” for the basket weave stitch and the strawberry stalk and leaves at the end. 

Pattern for a Tea Cosy Body: (Make 2)

6mm knitting Needles

Hayfield Bonus Aran

Using the Aran doubled, cast on 30 stitches. 

Row 1: K3, pattern 24, K3

Repeat 23 rows more. 

Row 25: K3, Sl1, K1, PSSO, Pattern 20, K2 tog, K3

Row 26: As Row 1

Row 27: K3, Sl1, K1, PSSO, Pattern 16, K2 tog, K3

Row 28: As Row 1

Row 29: (K2 tog) x 3, pattern to end. (No need to K the last 3)

Row 30: (P3 tog) x 3, Pattern to end.

Repeat Rows 29 and 30 once more. 

Cast off. 

  
To make up:

With the right sides facing back stitch from the top of the shaping, (i.e. From where you stopped Knitting 3 at the beginning and end of the row), across the top of the cosy and down to where the shaping starts on the other side. 

Sew up 2cm at the bottom of each side together.

Et Viola! You have the body of a tea cosy all ready for you to decorate in which ever way you fancy!

For the Strawberry, I used Deep Red (shade 830), knitted the first 4 rows in Garter Stitch and then my “24 stitch pattern” was Stocking Stitch, I Swiss embroidered the pips on afterward in Mustard (Shade 768).

The stalk and leaves were knitted in Lime (shade 772)

The stalk was an iCord using the yarn doubled with 4 stitches on 6mm DPNs and the leaves were knitted diamonds using the yarn doubled again on 6mm:

  1. Cast on 1
  2. Knit into the front and back of the stitch (3)
  3. K1, M1, K1, M1, K1
  4. P5
  5. K2 tog, K1, K2 tog
  6. K3 tog. 

I sewed the diamond tops together to form a leaf “hat” and then attached the iCord and sewed the whole thing onto the tea cosy. 

  
For the Basket Weave Stitch I used Light Natural (Shade 936) and worked the “24 stitch pattern” thus:

  1. K4, P4, K4, P4, K4, P4
  2. Repeat Row 1 
  3. Repeat Row 1 
  4. Repeat Row 1 
  5. P4, K4, P4, K4, P4, K4
  6. Repeat Row 5
  7. Repeat Row 5
  8. Repeat Row 5

Repeat rows 1-8 three more times. 

For the pansies I used: Tudor Rose (905), Purple Heather (871), Rusty (771), Navy (995) & Mustard (768). 

And, as another firm belief of mine is “Waste Not; Want Not”, you will notice that the surplus was crocheted into a giant granny square picnic blanket!

Perfect for sitting on whilst enjoying a beautiful and glorious afternoon cup of tea on an English Summer’s afternoon! 

Now pass me the Lemon Drizzle cake…

Bye Baby Bamboo Bunting…

I’ll let you into a little secret; a few years ago I had a Brief Encounter with a yarn I would not have even looked at normally! More recently, after using it on a major commission, this “fling” has now blossomed into a full scale romance of which even Mills and Boon would be proud! 

I admit it; “I am in love with Snuggly Baby Bamboo!” 

You may wonder why I would have normally overlooked this yummy little yarn. 

It’s simple, it’s often tucked away with all the baby yarns and unless you have a beautiful bouncing baby for which to knit, it is all too easy to ignore the “Baby Section” for more tantalising and tempting “grown up” yarns!! 

The reason I ventured forth into the pastel palace of baby yarns was that a cousin had had the cutest little girl and, worried that she would be inundated with lots of marvellous matinee jackets from her prolific Grandma, I decided that bunting would be just the thing!! As, let’s face it, one can never have too much bunting in a baby girl’s room!

The Baby Bamboo really stood out from the other yarns; it has a plush pearlescence about it that is very very alluring and it comes in a dizzying amount of colours!! It did seem perfect for my intended project. 


Using a standard 4mm hook, the result when crocheted was just scrumptious! The texture is slightly springy and very soft but firm. Making it an absolutely perfect yarn for beautiful blanket making too. 

The Yarn, which is made from 80% Bamboo Viscose and 20% wool, is a natural fibre which enhances its appeal even more in my humble opinion. 


I was recently contacted by a very lovely lady who had seen a photograph of the original bunting I designed four years ago and wanted to know if I could share the pattern as she wanted to make it for her English Country Garden themed Wedding! 

I spent most of yesterday recreating the bunting so that I could share the pattern with you. 

(This was not exactly a chore as it was blissfully sunny and I was sat in the garden with The Archers podcast for company!)

So, without further ado, here is said pattern:

Materials:

Sirdar Snuggly Baby Bamboo DK:

1 ball each of 131Cream; 116 Lemonade; 114 Candy; 119 Peony; 115 Bobbi Blue; 133 Willow. 

Method:

Using Lemonade and a 4 mm hook, make a chain of 3.

Work 11 half trebles into the last chain from the hook. 

Slip stitch into the top of the original chain. 

Cut yarn and finish off. 

 
With Cream, insert hook into a stitch and make a 4 chain. Into the same stitch work a 2 double treble cluster. (Please see below if you would like more details)

*Ch 2 

Into the next stitch, work a 3 double treble cluster. 

  
Repeat from * until you have 12 petals. Chain 2 and slip stitch into the top of the first Cream chain. 

Cut yarn and finish off. 


With one of the remainng colours, insert hook in to the stitch next to the chain space, and make a 3 chain (counts as a treble).

Into the next stitch (at the very top of the cluster) work a treble. Work another treble into the chain space. 

Work in this way until you have 11 trebles. 

You should now be at a chain space for the next, corner stitch: work 1 treble, 3 chain, 1 treble all into the chain space. 

*Work another 1 treble into the next 11 stitches and work a corner stitch. 

Repeat from *

  
Slip stitch to the top of the chain to form a triangle. 

  
Next round (triangle?):

Work a 3 Chain, work 1 treble into the next 12 stitches.

This should bring you to the corner. Work the corner the same way as before. 

*Work 1 treble into the next 13 stitches and then work a corner. 

Repeat from *

Slip stitch to the top of the chain to form the finished pennant.

To make the bunting “tape”:

Row 1: Make a 20 chain in Cream, *DC into each of the stitches at the top of the pennant, chain 9. Repeat from * as many times as you need (it depends on how many pennants you want!). Chain 11, turn. 

Following Rows: 1chain, 1 DC into every chain/stitch from the previous row. Turn. 

Work 3 more “following rows”. 

And you are done!!

I shall now attempt to describe the various cluster stitches for those who may need it:

A double treble crochet cluster:

  1. Wrap the yarn twice around the hook
  2. Insert into stitch
  3. Wrap yarn around the hook and pull back through the stitch. 
  4. Wrap the yarn around the hook again
  5. Pull the last wrap through the first two stitches on the hook. 
  6. Wrap the yarn around the hook again
  7. Pull the last wrap through the first two stitches on the hook. 
  8. You should now have 2 stitches on the hook
  9. Repeat stages 1-7 once for a 2 double treble cluster or  twice for a 3 double treble cluster. 
  10. You should have either 3 or 4 stitches on your hook. 
  11. Wrap the yarn around the hook and pull through all the remaining stitches. 

  
Here is the 3 double Treble at stage 10. 

Conclusion:

I do hope you like my lovely little bunting and I really do hope that it puts in an appearance at the English Country Garden Wedding!! 

T. T. F. N!

Alitzah. 

How To Make A Silk Purse (Without the Use Of The Proverbial Pig’s Ear!!).

There is a very neat little crochet stitch that I have come across recently and although incredibly simple, it looks so defined and delicate, with a really pleasing texture. I was reliable informed that it was called the “Seed” stitch.

There was, however, one enormous draw back; as only two colours were being used it meant there were pesky little ends that needed weaving in at the end of EVERY row! Eeeeeek! 

Now I find a tiny bit of weaving in as therapeutic as the next person but this was way too much!! 

As with all good ideas, it came to me as I was on my walk; use three colours so that the next colour is waiting at the end to start a new row!! Simple! 

Now, I’m sure I’m not the first person to come up with this straight forward solution and for all I know there are countless patterns out there that advocate the very same idea! 

So, having made a swatch…


I just had to decide what I fancied doing with it. 

I had initially thought that it would be a really sensible stitch for a Summer bag, given that it has a lovely, even, almost woven texture and is serendipitously reversible but I decided to do something simpler and smaller as a test project.  The obvious choice was a coin purse.

 
Luckily I have a very “healthy” stash of yarns and haberdashery and nestling amongst it were these jolly jewel-bright silks and this particularly perky purse clasp. 

Purse making is a very satisfying business, not only does it give you the opportunity to experiment with stitches and colours on a small scale, it can be craftily constructed quickly in an evening or over a weekend and the end product makes a perfectly pretty & practical present either for yourself or a friend. 

The other marvellous reward of purse making is that it deceptively simple! Essentially it involves two rectangles!!

To Make This Purse You Will Need:

  1. 10g (approx. 25 metres) of Yarns A, B & C. (30g altogether) 
  2. A purse clasp
  3. A 4mm crochet hook
  4. A small length of embroidery thread
  5. A sewing up needle
  6. A tape measure
  7. A pair of scissors

The Starting Chain:


The first thing you need to do is measure the inside of the clasp and make a chain the same length. 

The inside of my clasp was 12 cms and so because the stitch requires a multiple of 3 (+1 for the starting chain) I made a chain of 31 with Yarn A. 

The Foundation Row:

With Yarn A, Work a DC into the 2nd chain from the hook. 

Work a DC into every chain until the end. (30 sts)

The stitch:

Row 1: Ch 2, *miss a st, DC into next st, ch 1, repeat from * until last stitch, DC into final st. Turn 

Please do not cut Yarn A

Row 2: Change to Yarn B.

Ch 2, *DC into the next Chain Space (Ch Sp), Ch 1, Repeat from * to the end of the row. DC into last st. Turn. 

Please do not cut Yarn B

Row 3: Change to Yarn C. 

Ch 2, * DC into next Ch Sp, Ch 1, repeat from * to the end of the row. DC into the last st. Turn. 

Please do not cut Yarn C

Row 4: Change to Yarn A by “travelling” it up the side of the work from Row 1.

Ch 2, * DC into next Ch Sp, Ch 1, repeat from * to the end of the row. DC into the last st. Turn. 

Continue in this way until the piece is the right height. 

As a very loose guide, the height should be approx 3/4 of the original starting chain length. 

My starting chain was 12 cms long and so my piece needed to be 9 cms high. 

  
Having completed the first side, turn the piece around and work the second side of the piece using the original starting chain as your foundation row. 


Starting from Row 1, repeat for the second side. 


Sew in all the short ends. 

Find the middle of the top of the piece and line it up with the Middle hole on the Purse Clasp. 


Back stitch to the edge of clasp.

Repeat this until both pieces are firmly attached to the clasp. 

  
Simply sew up the sides and you are done!

Voila! You have a beautiful silk purse in which to keep your pennies nice and cosy!!


I hope you found this little pattern helpful and it has, in some small way, inspired you to make a purse of your own. 

As a helping hand, I shall be running a competition on my FaceBook Page to win this cute kit…


Please do pop over to FaceBook, Of Blithe Spirit, and take a look. 

Looking forward to seeing you there! 

In the meantime, I think I will have a go at a producing a bag too!